 / Build guides
Set up Arduino as an ISP for ATtiny85
Use a standard Arduino as an ISP from the Arduino IDE to program a bare ATtiny85 on the spare-parts programmer - wiring and upload steps for Episode 02.
The setup, in 6 steps
Before you start
This is the software half of the Episode 02 spare-parts programmer: using an Arduino as an in-system programmer (ISP) to flash a bare ATtiny85 from the Arduino IDE.
You need a standard Arduino (Uno, Nano, or similar) wired to the ATtiny. Build the hardware with the programmer circuit guide. Only used a Digispark before? That's a different path - see the Digispark setup guide.
What's next
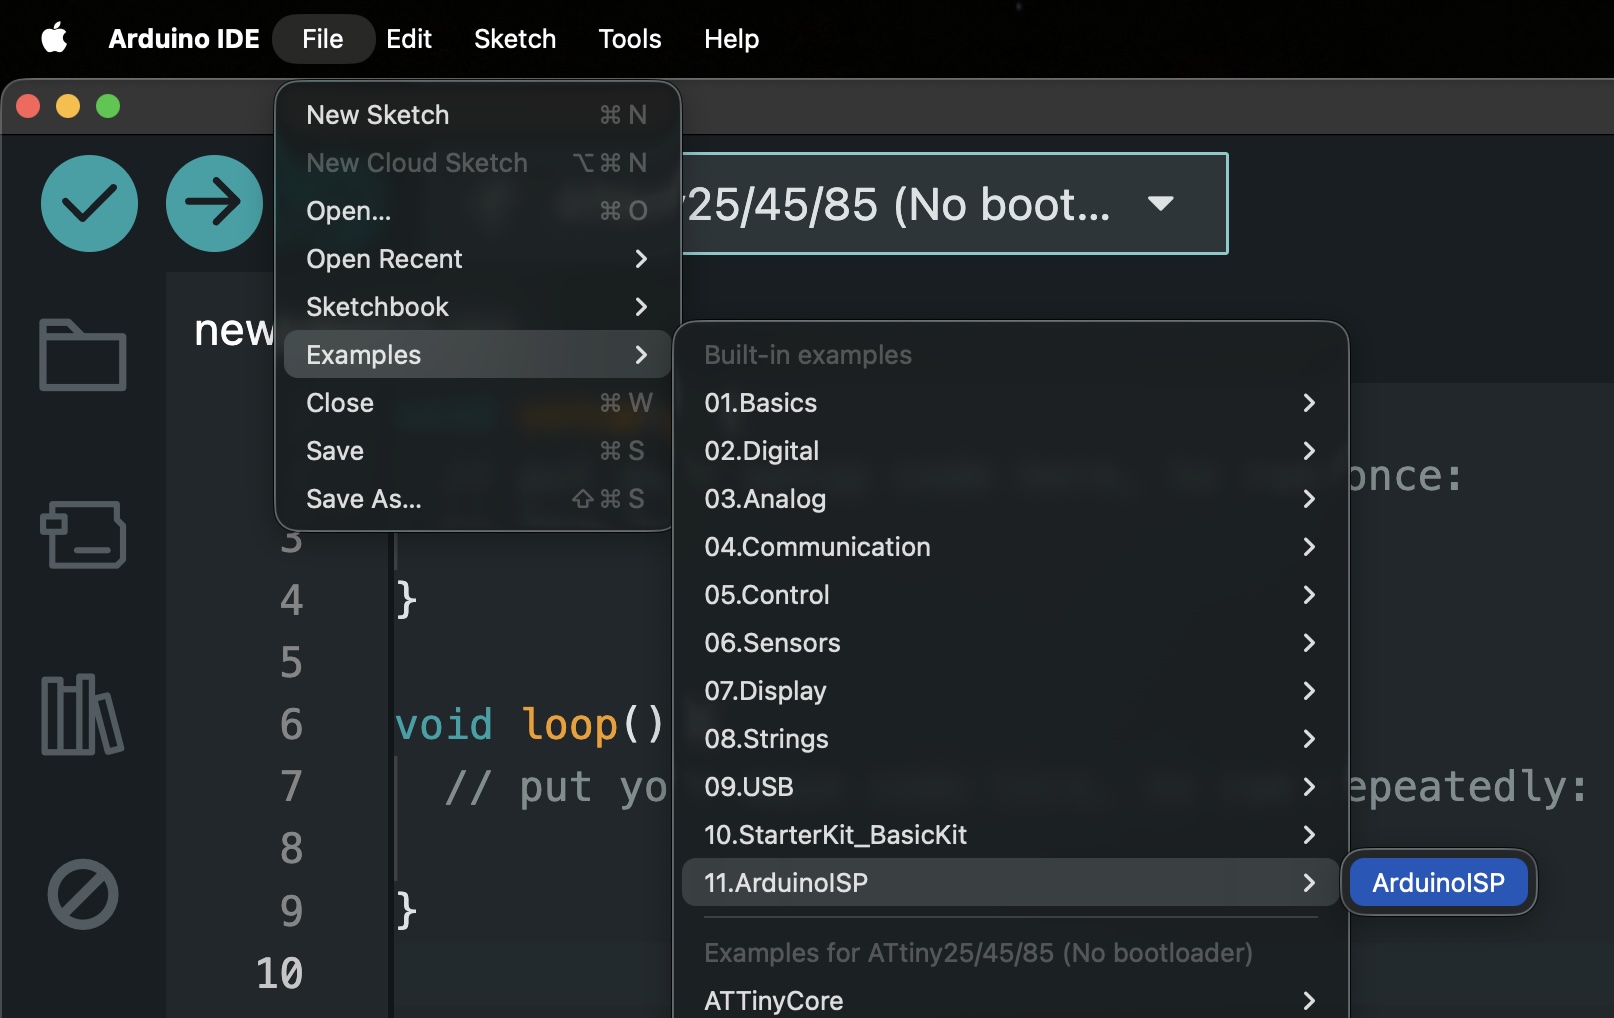
Load Arduino as ISP
First, turn your Arduino into the programmer. This only needs the stock AVR core, so you can do it before installing anything for the ATtiny.
- Set Board and Port to your Arduino (not the ATtiny). If you've built the programmer circuit, switch the reset cap off first, or this upload will fail.
- Open File → Examples → 11. ArduinoISP → ArduinoISP.
- Upload. That board is now your ISP until you flash something else onto it.
Add the Boards Manager URL
The ATtiny85 is supported by ATTinyCore (Spence Konde). Point the IDE at its package index now; you'll install the core next.
Open File → Preferences (IDE 1.x) or Arduino IDE → Settings (IDE 2.x). Shortcut: Ctrl+, / ⌘,.
Next to Additional boards manager URLs, open the list editor.
Add one of these - both point at the same index:
GitHub - use this if the other URL fails on a certificate or HTTPS error:
https://raw.githubusercontent.com/SpenceKonde/ReleaseScripts/refs/heads/master/package_drazzy.com_index.jsonMaintainer index (HTTP):
http://drazzy.com/package_drazzy.com_index.jsonClick OK.
raw.githubusercontent.com link is the same file, served over HTTPS.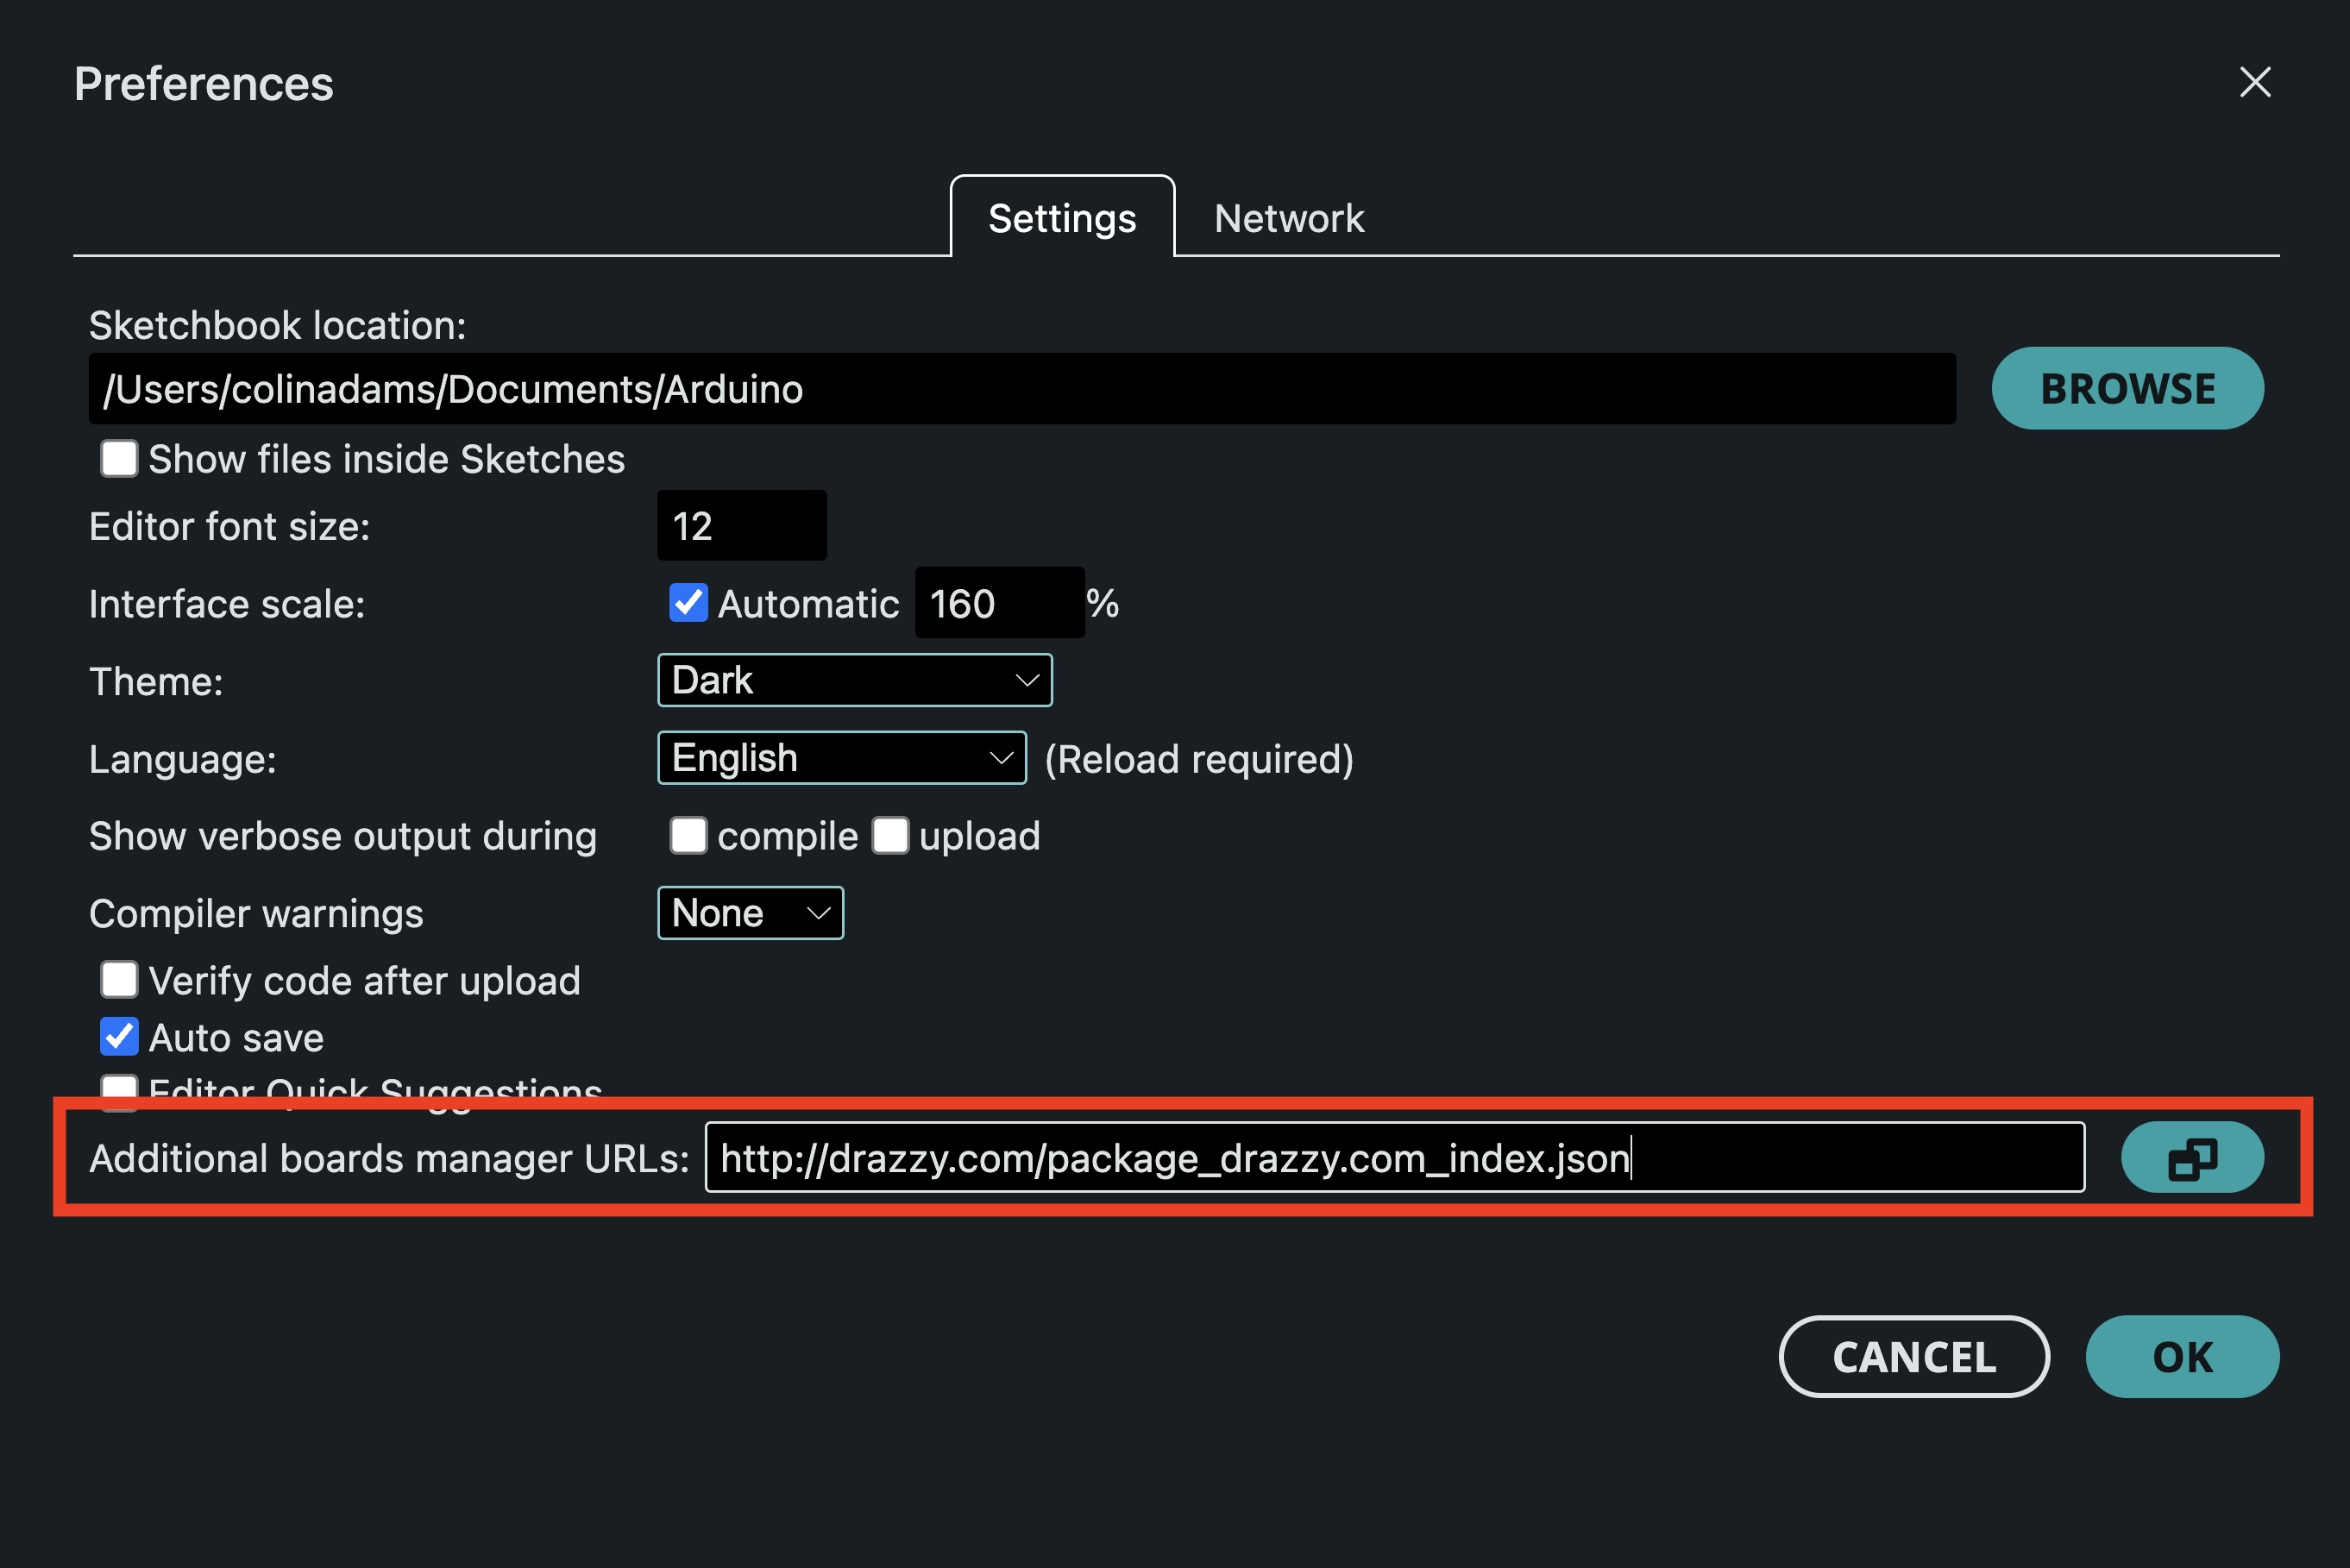
Install ATTinyCore
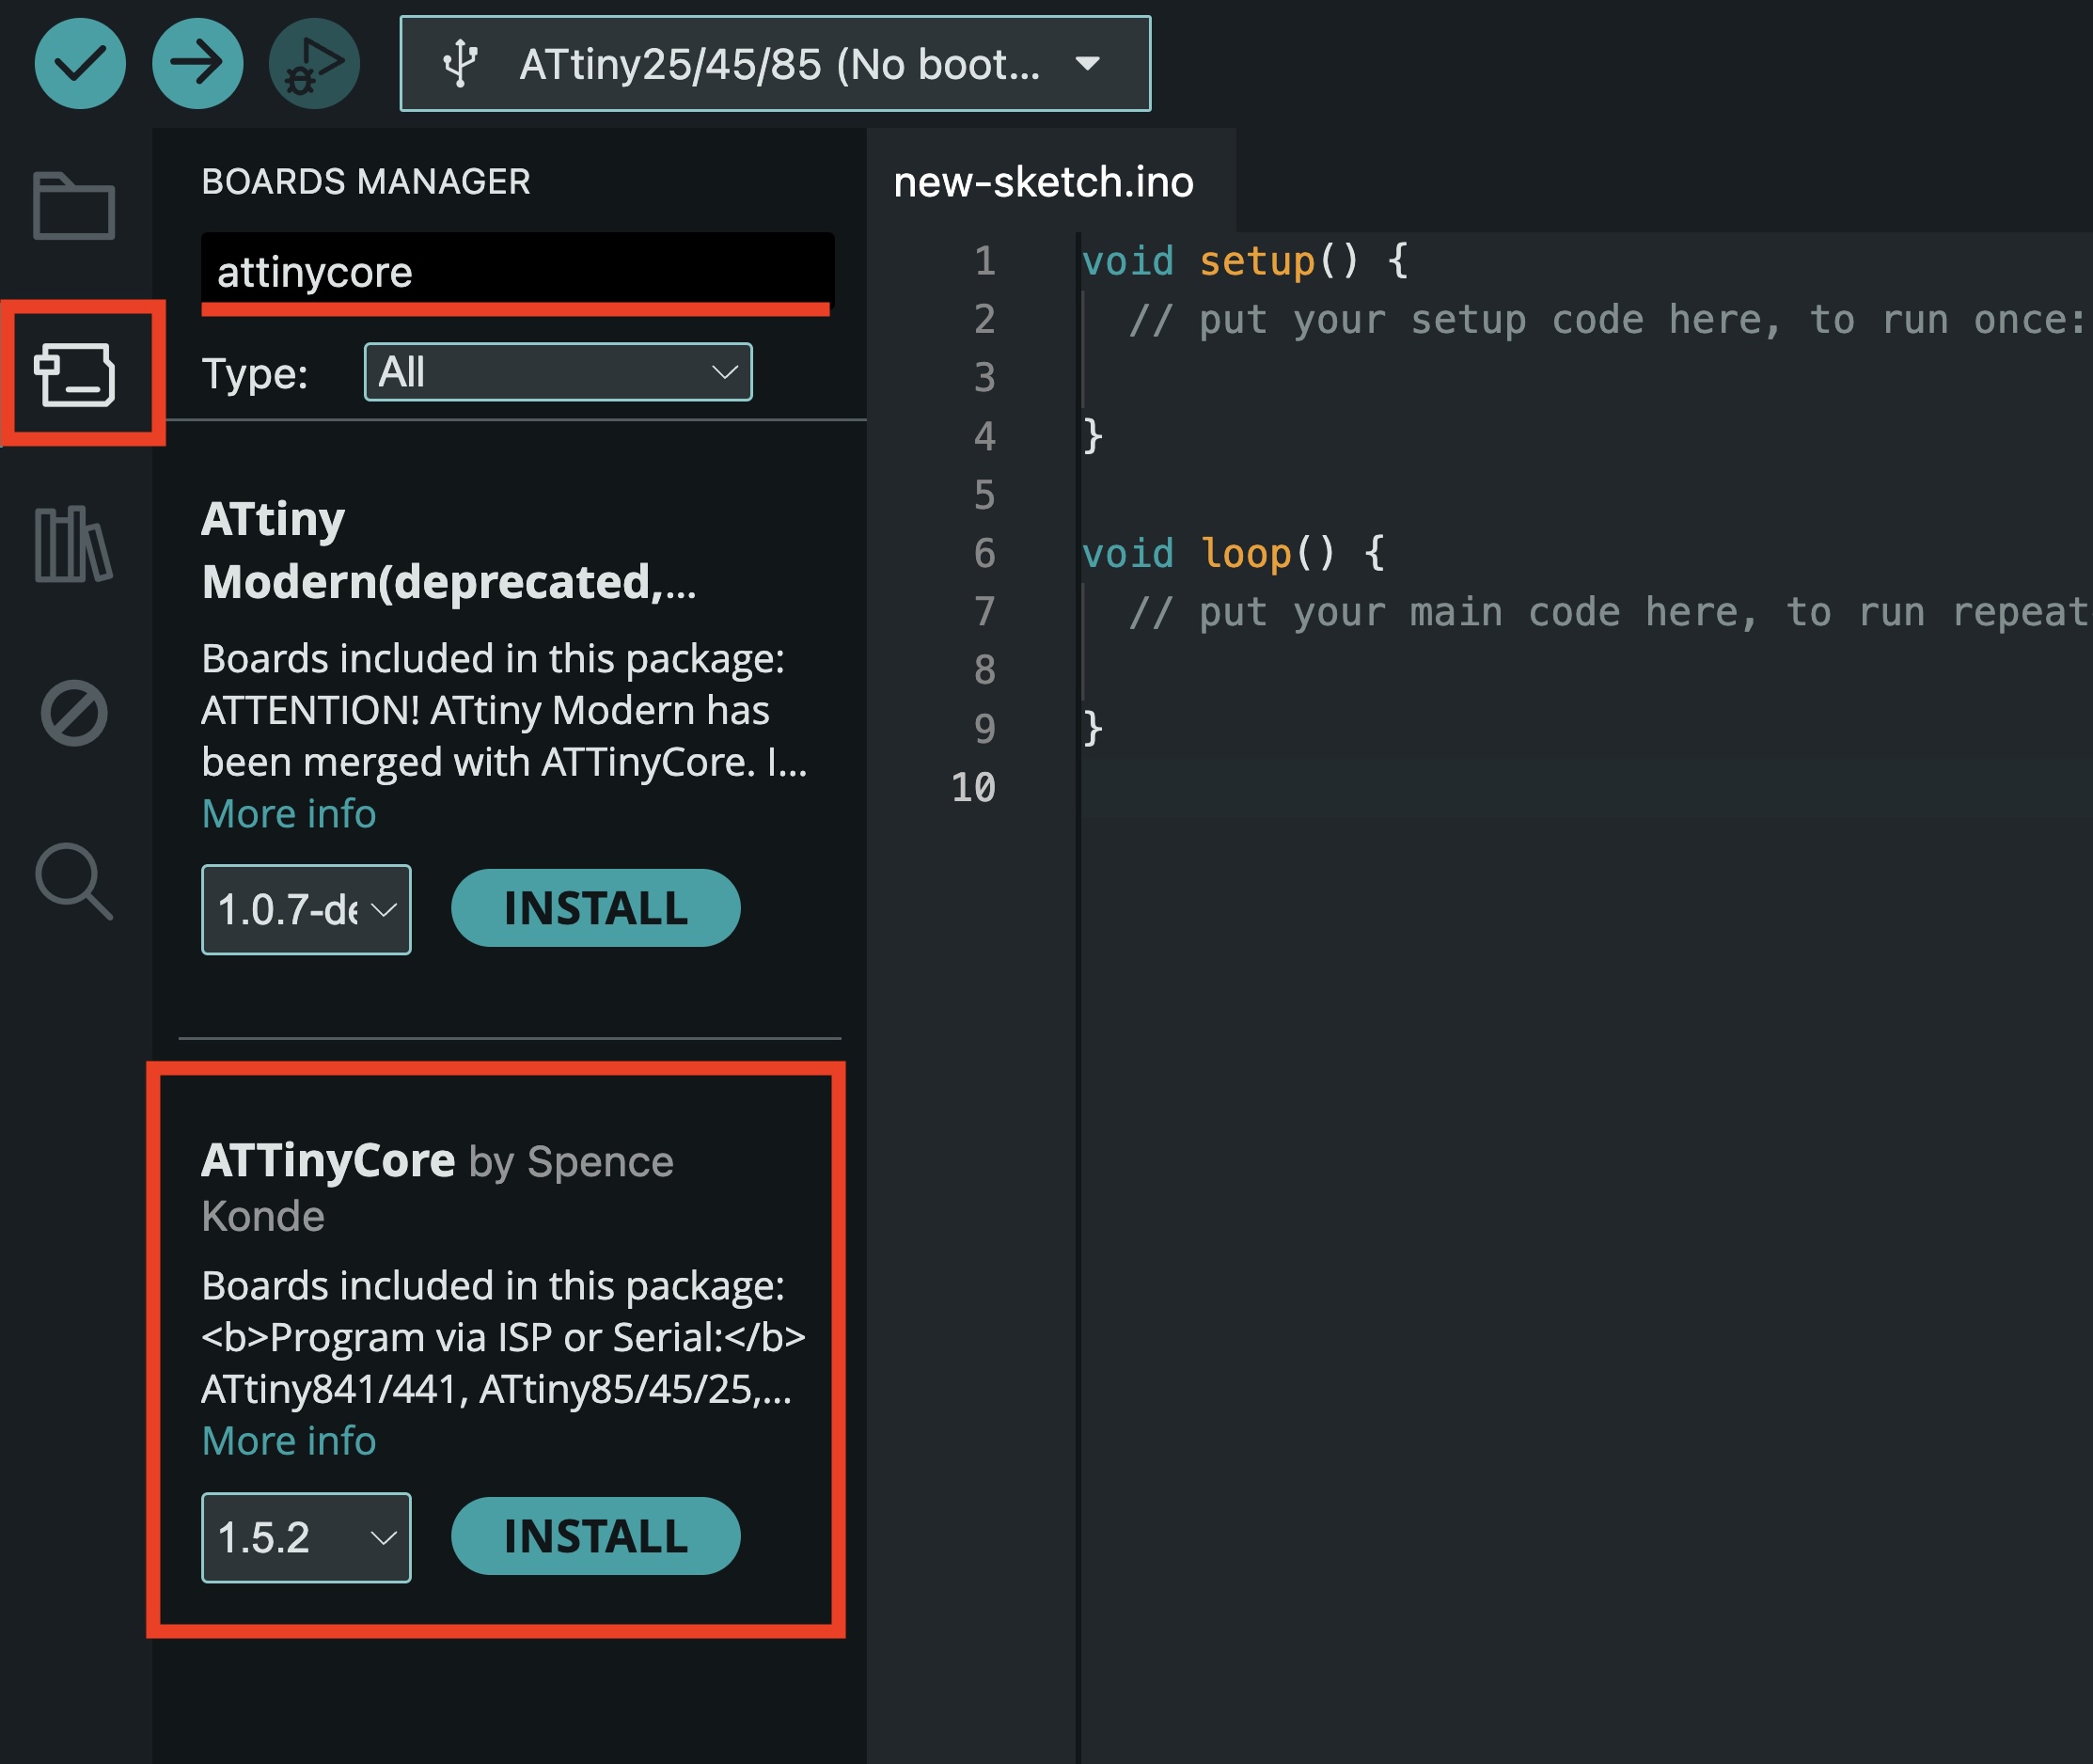
- Open Boards Manager from the sidebar, or Tools → Board → Boards Manager…
- Search for ATTinyCore.
- Install ATTinyCore by Spence Konde and wait for it to finish.
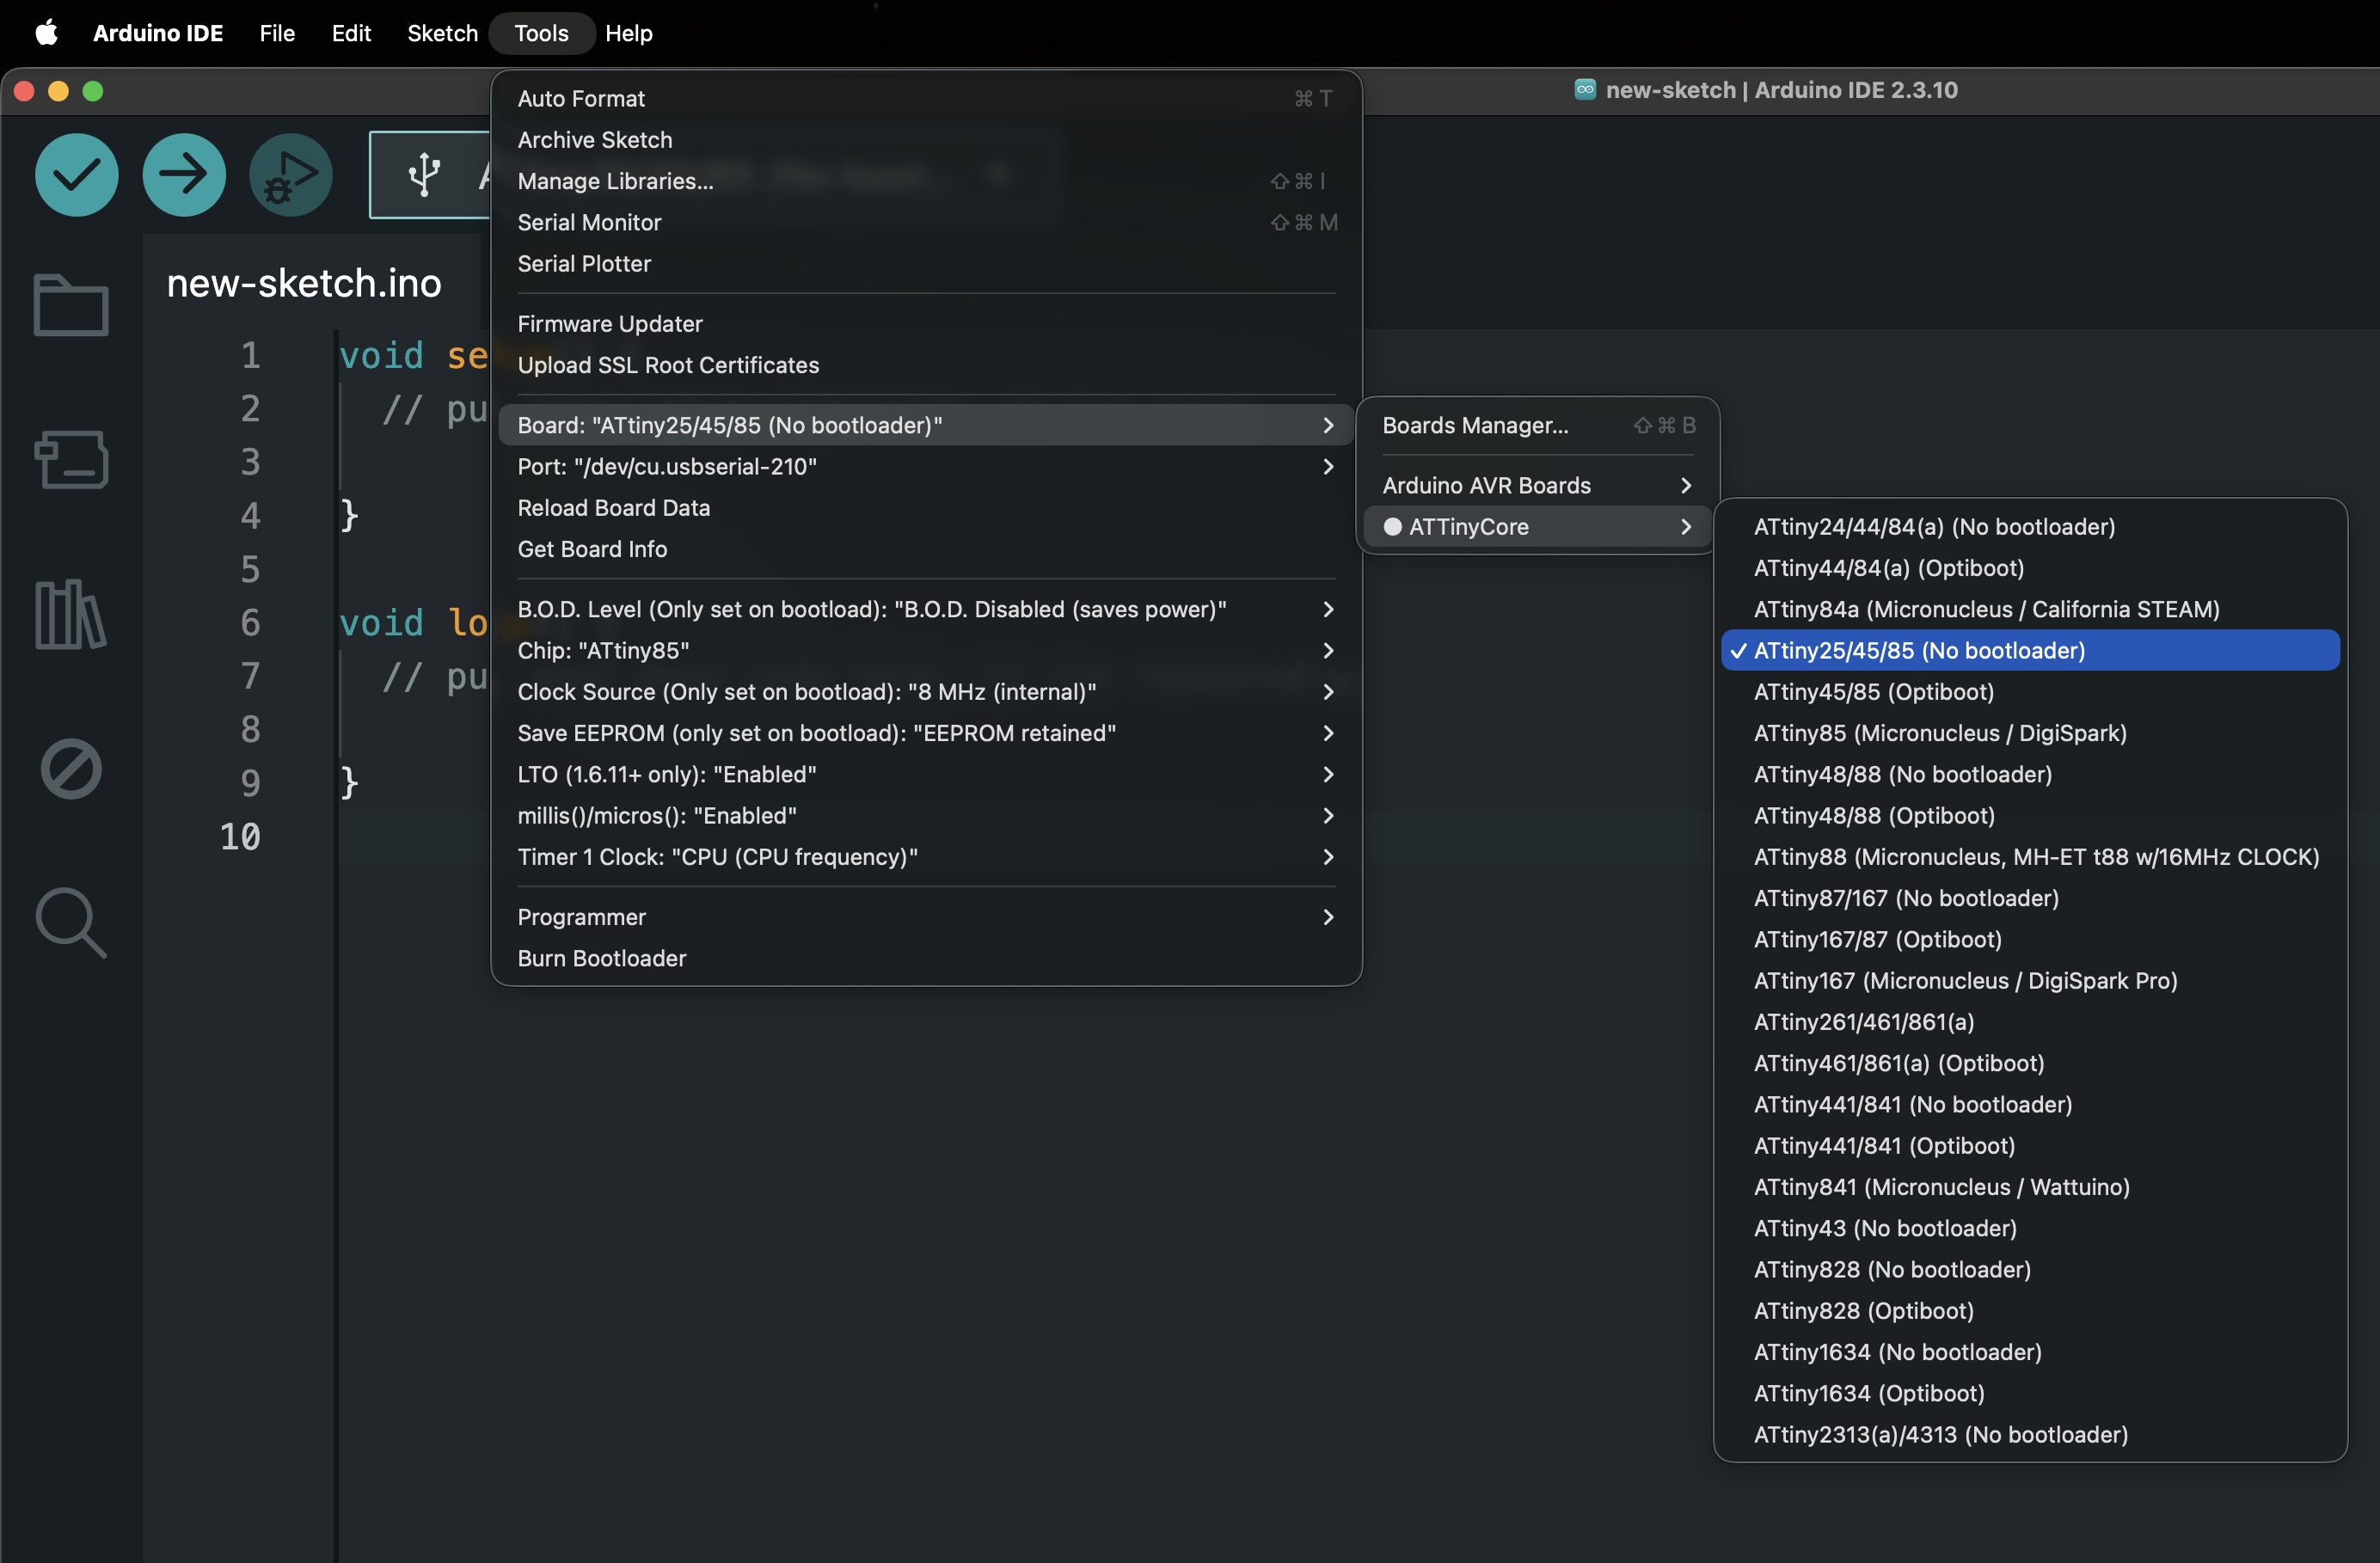
Choose the ATtiny85 board
- Open Tools → Board and find the ATTinyCore group.
- Pick ATtiny25/45/85. Internal 8 MHz is a safe default for breadboard builds.
You can switch clock or BOD settings later if a sketch needs them.
Set the programmer
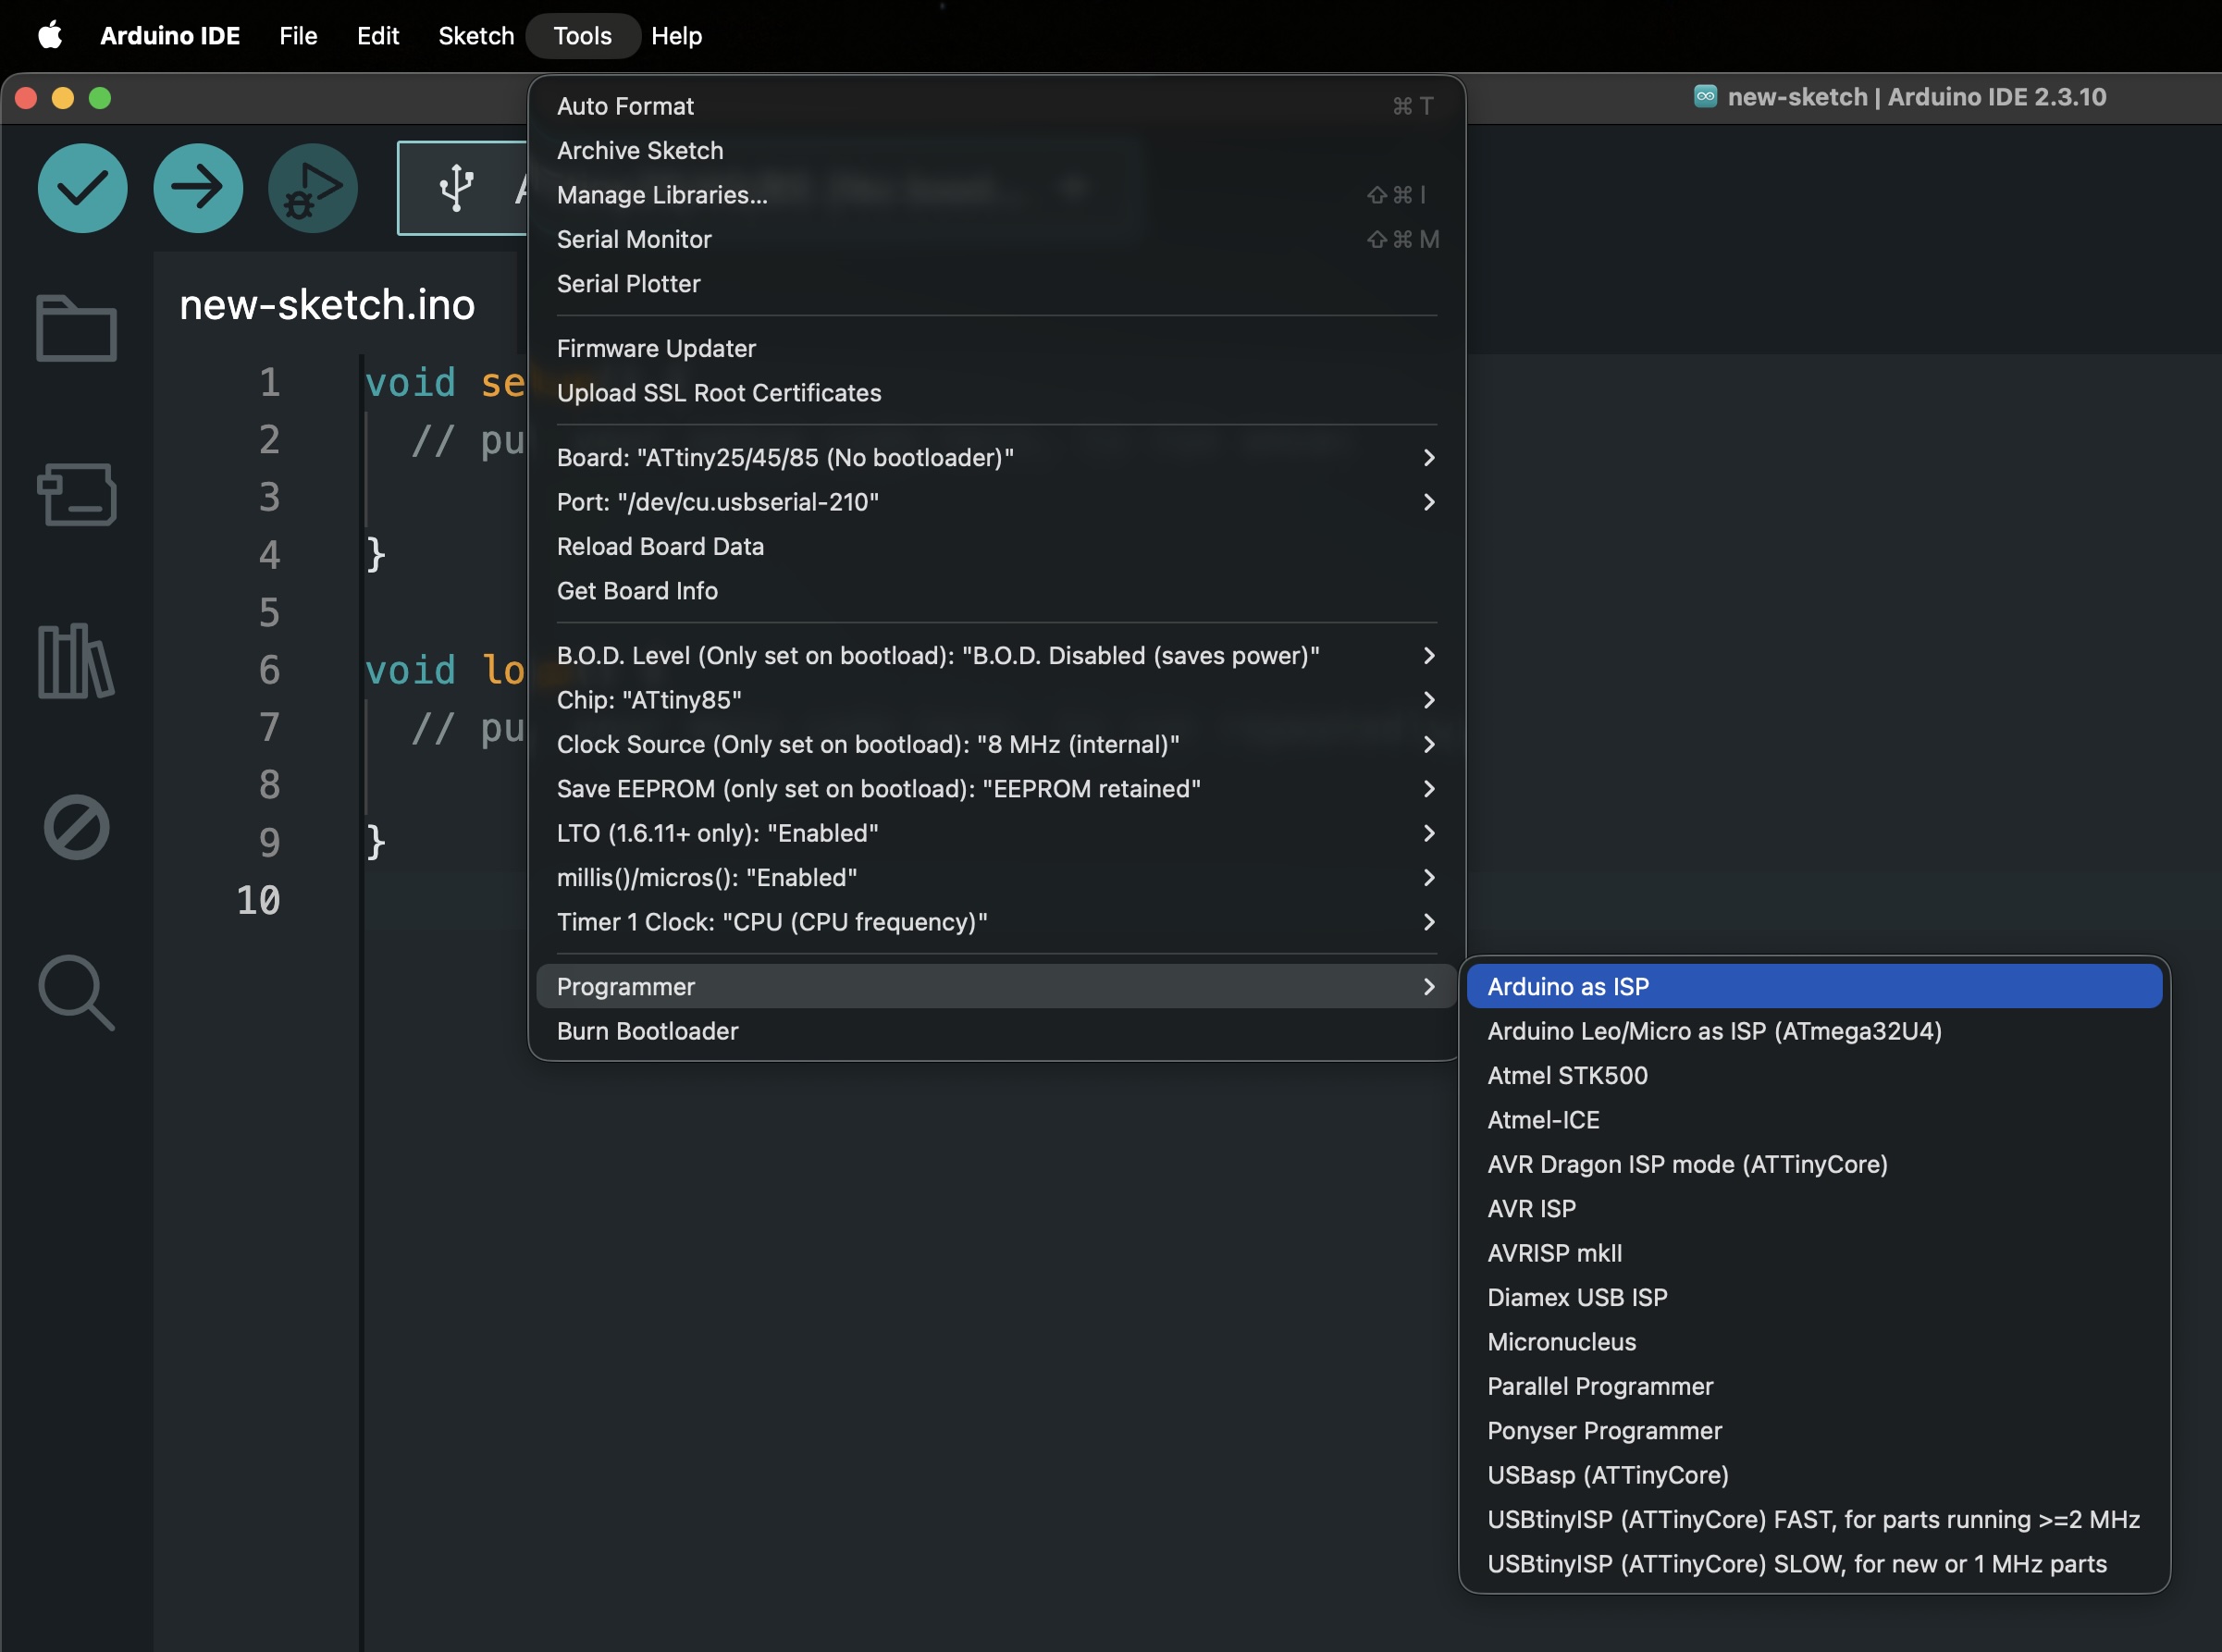
Tell the IDE to upload through your ISP, not the ATtiny's bootloader.
- Open Tools → Programmer.
- Choose Arduino as ISP. If both appear, pick that one rather than ArduinoISP.
Leave Port on your programmer Arduino from step 01.
Upload to the ATtiny
Have your programmer connected first: the Arduino still running the ISP sketch, wired to the ATtiny, with the reset cap switched on. No programmer yet? Build one with the spare-parts programmer guide, then come back.
Regular Upload targets the ATtiny directly - but it has no USB, so you upload through the programmer instead.
- Open your sketch. For a quick test, use File → Examples → 01.Basics → Blink and set the LED pin to match your wiring.
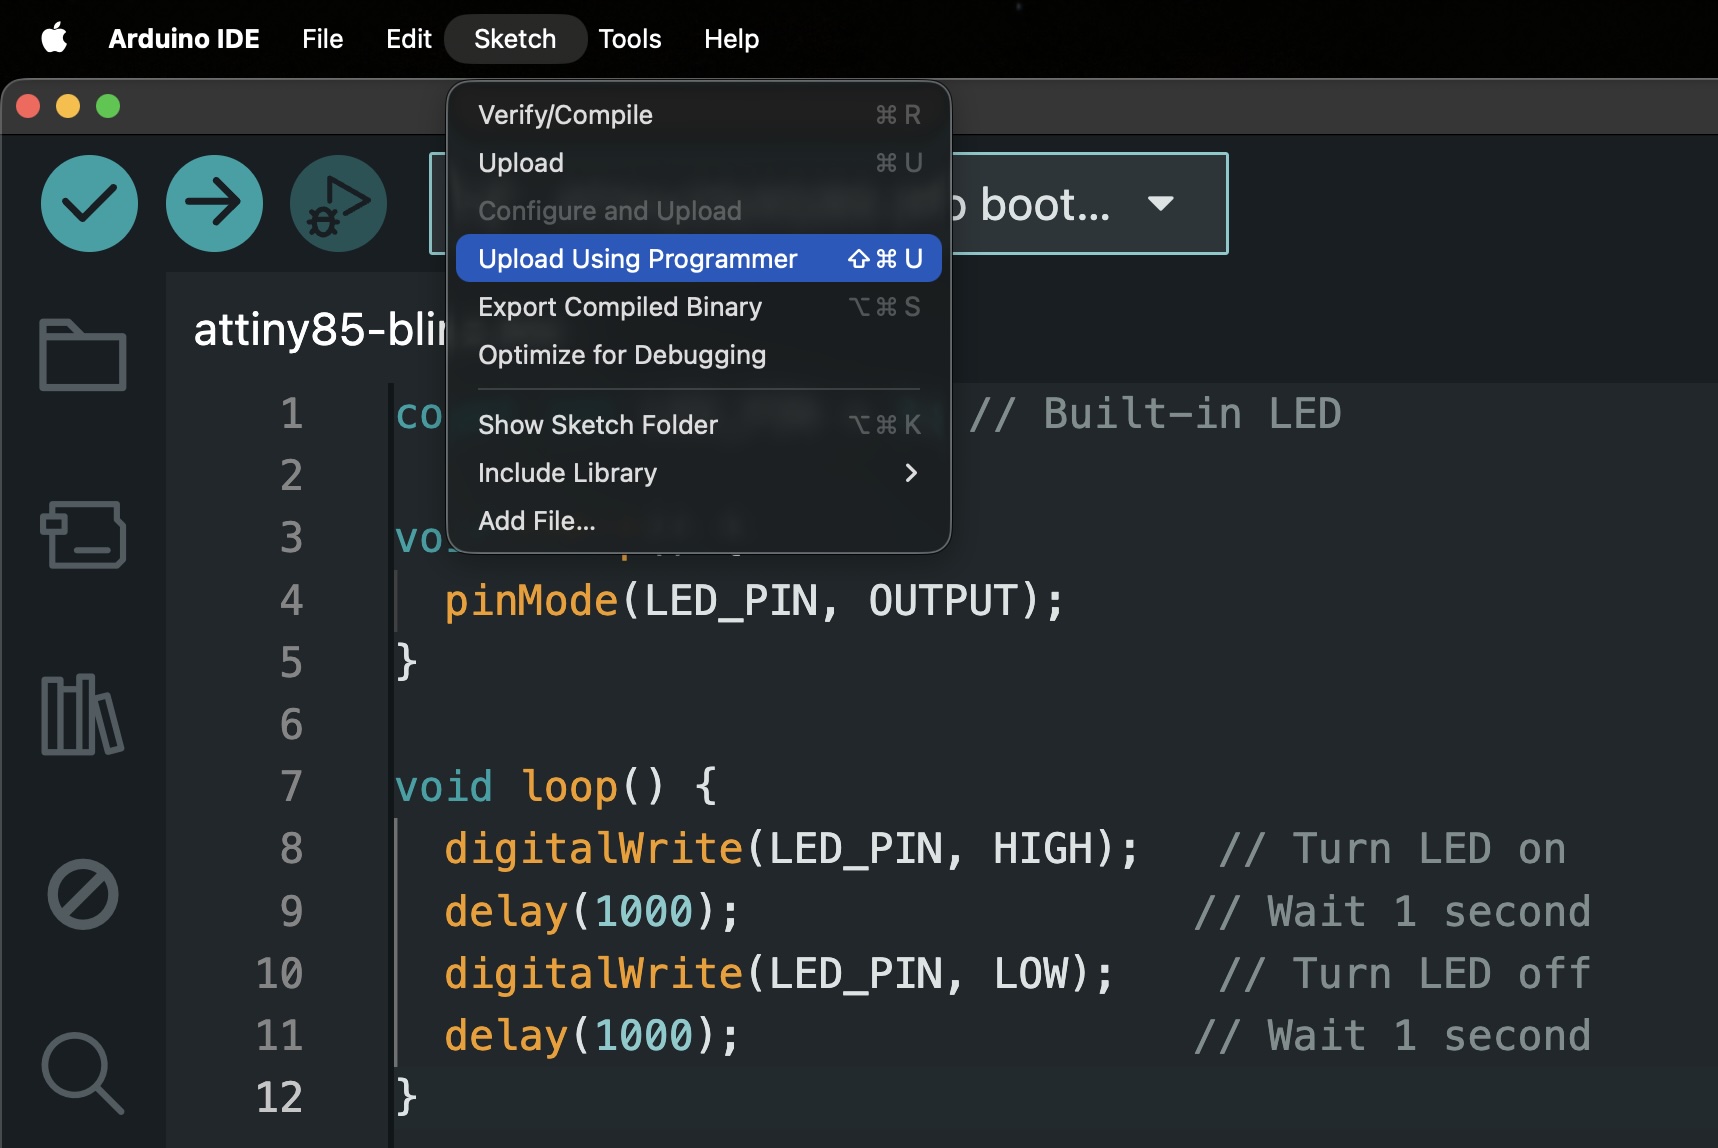
- Run Sketch → Upload Using Programmer.
- Wait for Done uploading. If it fails, recheck Board, Port, Programmer, and your wiring against the hardware build.